Plone User Accounts and Roles
Plone web sites come in many flavors, ranging from personal websites with one user to community, organization, or business websites that could have hundreds of users. Each person who adds content to a Plone web site has their own user account. A user account includes a user name and a password. Some Plone sites allow people to sign up by visiting the site, clicking a Join link, and filling out basic user information. Other sites have user accounts that are created by web site administrators, in which case people normally receive emails with the user account details.
However created, a Plone user account allows a person to log in by typing their user name and password. Passwords are case-sensitive, which means that you have to pay attention to the uppercase and lowercase letters. For example, if your password is xcFGt6v, you would have to type that exactly for it to work. Passwords that have a variety of characters in them are preferred over passwords like "raccoon" or "boardwalk," as they are more difficult to guess and therefore more secure.
Anonymous vs Authenticated Web Surfing
The distinction between anonymous web surfing and authenticated (logged-in) web activity is an important one:
Anonymous Web Surfing
This is the normal experience for a person surfing the web. You type the web address of a web site into your browser and you look at web pages, watch videos, view images, but you don't have to log in. This is why this mode is called anonymous: anyone can do it just by surfing normally.
Pro tip: you can use two different browsers (like Firefox and Chrome), and not log in with one of them. That way you can easily compare how visitors will see your site, and you can spot content that is not yet published.
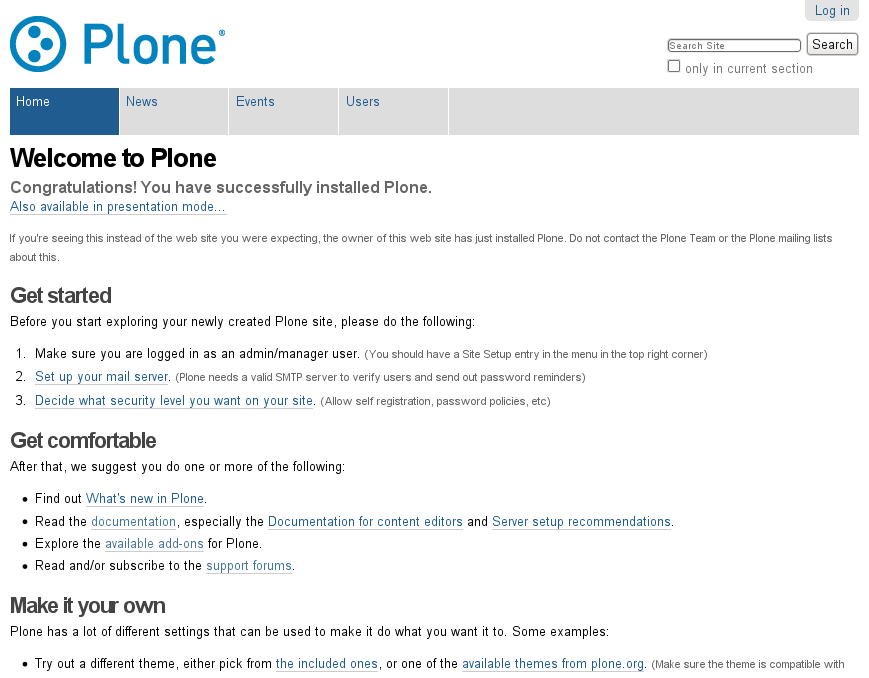
Note the presence of the log in link the screen image below (top right). If there is a log in link showing, you haven't logged in -- and you are surfing the web site anonymously, as seen in the following screen capture of a new Plone web site:

Authenticated (Logged-in) Web Activity
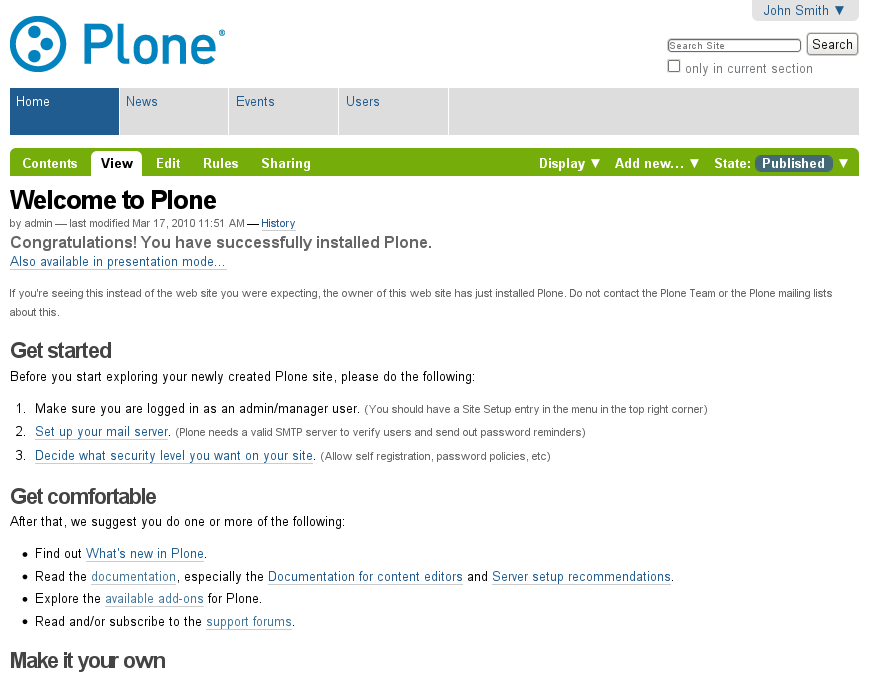
You know the authenticated mode of web experience if you have ever used a bank or credit card website, or any other website that involved a user account. A bank web site will let you view your account information, fill out information forms, transfer funds, and do other actions, but only after you have logged in. A Plone web site is not much different, except that you can do more sophisticated things. Compare the screen image below, captured after a user called "John Smith" has logged in. Near the top right you see John Smith's name, this is a drop-down menu with options for managing your settings, and to log out. There is another important difference you see after logging in -- the main area in the middle now has a green header strip with tabs. This sort of header strip is present when a user has rights to change an area of the website. John Smith has the user rights to change this main area. The tabs in the green header strip for the main area will vary somewhat, but you can count on it looking like a tabbed interface with this particular green color. In the following screen capture, user John Smith has logged into a new Plone web site:

User Roles
Equally important is the distinction between different user roles on a Plone web site. To illustrate the simplest case, let's consider two user roles, one called member and the other called manager. Consider the different rights or "power" of these two roles:
Member
- has a user account, so can log in
- can add content, but only in specific areas, and can't change anything outside of this area; often users are given a "home area," to treat as personal space where they can add content.
- can not publish content so that it is visible to the anonymous web surfer, even content which they added; a person with manager role must approve content for publishing note: in many organizations, members are allowed to publish content on parts or all of the site. This is a policy that you can set up for each site or even part of the site
Manager
- has a user account, so can log in
- can add content anywhere and has the power to change anything
- can publish any content
When you get your new account on a Plone web site, you should be given information indicating where you have the right to add content, after you have logged in. After logging in, if you go to a folder where you have rights, you'll see a header strip that has a green color with tabs for contents, view, edit, rules**, and sharing:

You'll be able to explore to find the differences between these tabs, but here are descriptions to help you start:
- Contents - shows a list of items in a folder
- View - shows the view an anonymous web surfer would see
- Edit - shows a panel for changing a view
- Rules - shows a panel for controlling how an item is created and managed
- Sharing - shows a panel for setting rights of other users to see or edit content
You also see menus in the lower part of the green header strip, Display, Add new..., and State:

Explore these also. Here are basic descriptions of these menus:
- Display - shows menu choices for setting the display type (list view, summary view, etc.)
- Add new... - shows menu choices for adding content items (images, pages, folders, etc.)
- State - shows menu choices for setting publication state (private, public draft, public, etc.)
These menus and tabs will offer the main ways you interact with Plone. You will become very familiar with them as you learn more about managing a Plone-powered website.
